Saturday, December 31, 2011

Cheesy Broccoli Chicken & Shells

This was one of those nights when I opened the fridge and stared blankly into the abyss.  I shut the fridge and reopened it at least three times before removing the chicken.  That was step one.
Unsure of how to proceed, I moved on to the pantry, which I opened and closed at least twice before pulling out the pasta shells.  This continued until my counter was loaded with heavy cream, parmesan, frozen broccoli, chicken, mozzarella, butter, and shells.  Decided this was going to have to work and moved on to the cooking portion of the evening.
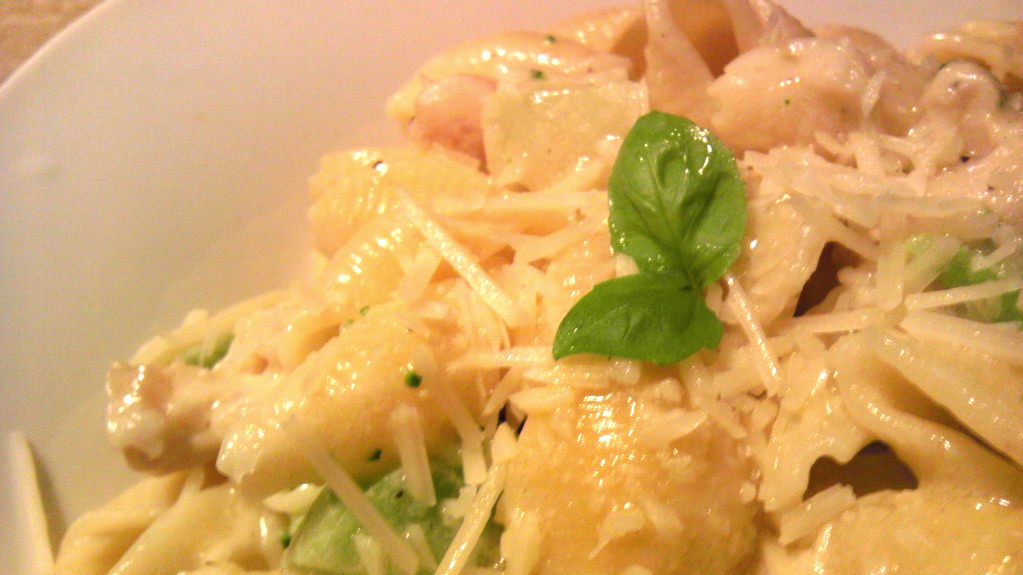


As I boiled the pasta, of course adding at least half a cup of salt to the hot water, I started a sauce.  I guess I could write this as a recipe in case anyone wants to make it, so here goes....

Ingredients:

1 lb uncooked chicken breasts, diced
1 package chopped frozen broccoli
1/2 cup heavy cream
1/2 cup Parmesan cheese, freshly grated
1/2 cup Mozzarella, shredded
1/2 cup butter
3 cloves minced garlic
Freshly ground salt and pepper, to taste
1 package pasta shells

Cook pasta to al dente.  Drain, reserving 1/2 cup of water. Pour reserved water back into pasta in a large mixing bowl.
In a skillet over medium heat, cook chicken in a tablespoon of olive oil until done.  Add butter and stir until melted.  Add garlic and saute 2 minutes. Stir in both cheeses and heavy cream, mixing well to incorporate. If it's looking like it isn't saucy enough, you might want to splash in some chicken broth.  Add in broccoli and cook at a light simmer until warmed through. Toss sauce with pasta.  Garnish with freshly grated Parmesan and basil.

I think this one was a winner, especially for one of those random dinners that was tossed together at the last minute.  Feel free to change it up as you see fit, exchanging the broccoli for sun dried tomatoes and sliced black olives, or roasted red peppers and sauteed mushrooms. The possibilities are endless!

Thursday, December 29, 2011

Cavities, anyone?

I made caramel corn tonight for the first time, and it was delicious.  But there isn't anything more comedic than looking around a room full of loved ones to see every last one of them picking their teeth with their fingernails in silence because no one could wait until the caramel corn was set up to eat it. Totally worth the extra tooth brushing time needed, though, I might add.


Homemade Caramel Corn

1 cup brown sugar
1/2 cup butter
1/2 cup corn syrup
1/2 tsp salt
1 tsp vanilla extract
1/2 tsp baking soda
4 quarts popped popcorn

Spray a roasting pan or shallow baking dish with cooking spray.  Preheat the oven to 250.  Pop 4 quarts worth of popcorn the old fashioned way, over the stove.  Pour the popcorn into the roasting dish.
In a heavy duty saucepan, heat the brown sugar, butter, corn syrup, and salt until it reaches a full boil, stirring constantly.  Turn the heat down to medium-low and let it boil for five minutes untouched.  Remove from heat and stir in the baking soda and vanilla.  Pour the caramel over the popcorn, stirring until very well coated with a rubber spatula.  Bake 45 minutes, stirring occasionally.  Turn out onto parchment ande stir with spatula, breaking apart as it cools.  Let cool twenty minutes and break apart last pieces.  Store airtight at room temperature for up to a week. 

My awesome sister in law kept sneaking bites, and got busted in the act.


It was a success, and kept everyone blissfully silent for a few minutes munching before the twenty minutes was up, and the caramel was still chewy.  Delicious!

Apple Fritters

I was in the mood for something easy, delicious, and slightly sweet today but wasn't sure what to make.  As I glanced through the fridge I remembered an episode of Rachel Ray that involved easy apple fritters and decided to make a spin on those.  They were perfect, and Brooklyn is still walking around with one in her hand as we speak.


Easy Apple Fritters:

2 c Bisquick
4 Granny Smith apples
1 1/2 c water
1 tsp cinnamon
3/4 tsp nutmeg

Heat 2 cups of vegetable oil in a skillet until a piece of bread turns dark golden in under a count of 40. Core the apples and slice them in 1/4 inch slices.  Mix the Bisquick, water, nutmeg, and cinnamon into a batter. Coat the apple slices and fry them until golden on each side, one at a time.  Drain on paper towels and sift powdered sugar on top.  Serve fresh.


So easy, delicious, and perfect for the whole family.  And leftover batter is perfect drizzled into hot oil til golden, drained on a towel, and with powdered sugar on top tastes remarkably like a delicious spiced funnel cake.

Monday, December 26, 2011

Simple Chocolate Cupcakes with Buttercream Roses

Christmas has come and gone, in a whirlwind of activity.  Baking, cooking, candymaking, cleaning, wrapping, unwrapping, hair-pulling, and loving, and now the aftereffects... cleaning and playing with new toys.  One of my new toys was an awesome decorating set that I decided to stay up all night messing with.  These cupcakes were the result of that playtime. As if I hadn't spent enough time in the kitchen the last two weeks...


Cake: adapted from here
Makes exactly 12 cupcakes or one double layer 8 inch round cake.

1 1/2 cups flour
1 cup granulated sugar
1 tsp baking powder
1/2 tsp baking soda
1/2 cup cocoa powder
1 1/2 sticks softened butter
2 eggs
2 tsp vanilla extract
2/3 cup sour cream

Preheat oven to 350. Dump everything into a food processor and pulse until well incorporated and a batter is formed.  Use a rubber spatula to scrape down the sides and mix well.  Divide into a prepared 12-cup muffin tin and bake 30 minutes or until toothpick inserted in center comes out clean.  If you don't have a food processor, measure the dry ingredients into a medium bowl and whisk to incorporate.  Mix the wet ingredients together well, then fold in the dry ingredients until the batter is formed.

Buttercream frosting:

1 cup softened butter
4+ cups powdered sugar
1 Tbsp heavy cream
Food coloring
1 tsp vanilla extract

Mix butter and 4 cups of sugar 3-5 minutes, until fluffy and light.  Continue mixing and add first vanilla, then cream, then food coloring.  Still beating, continue to add in powdered sugar until frosting reaches desired consistency.  I think for these cupcakes I used about 5 1/2 cups of powdered sugar so that the rose petals wouldn't lean into each other.

Helpful hint:
I set a baking sheet in the freezer.  After letting the cupcakes cool for fifteen minutes, I set them all on the baking sheet inside the freezer, removing them one at a time to frost them, then returning them to the freezer once they were frosted.  I left them in the freezer about fifteen minutes them removed to my cake plate. This help the buttercream stay stuff without melting down anymore and gave it a chance to set and reduce the risk of softening my rose petals.

To Frost:
Using my 104 tip, I created a small cone in the middle of the cupcake.  I formed three petals around the cone, pulling back slightly on each one to create a slightly folded look to the petal.  I continued out from the center, adding more petals until I reached the edge of the cupcake.  There are some really good Youtube videos about making buttercream roses that can describe it much more easily than I just did, though, so that would probably be smarter if you've never frosted flowers before.  It's not hard, it's just a lot easier if you've seen it done before trying it out for yourself. 

Thursday, December 22, 2011

Party!

Christian's school party is this afternoon, and for the occasion I wanted to find something to make that was all around accepted by everyone.  Something totally kid friendly, easily transportable, and that tastes as amazing as it looks.  And so we have... melted snowman cookies.

The sugar cookie recipe is one I particularly liked because of the soft fluffiness of the cookies.  They are sturdy but your teeth sink right in. Perfect for little hands and mouths.


Ingredients:
1 cup softened butter
1 1/2 cups white sugar
3 eggs
1 tsp vanilla
3 1/2 cups flour
2 tsp cream of tartar
1 tsp baking soda
1/2 tsp salt

Cream butter til fluffy.  Blend in sugar and continue beating 1-2 minutes. Mix in eggs one at a time, until well incorporated.  Mix in vanilla by hand.  In a separate bowl, whisk together flour, cream of tartar, baking soda, and salt.  Mix into wet ingredients by hand until a dough forms.  Transfer to plastic wrap and refrigerate overnight.
Preheat oven to 350.  Roll out dough on floured surface and cut into shapes with floured cookie cutters.  Bake 6-8 minutes or until very lightly golden. These get puffy in the oven so remember that when making your shapes.

To Decorate Snowmen:

Use cookie icing without any coloring (2 cups powdered sugar plus drizzles of milk until you reach desired consistency, about 2 Tbsp, plus 1/2 tsp vanilla) and frost the top of each cookie, allowing some to dribble down the sides of the cookies like melting snow.  Spray a microwave safe plate with a little cooking oil and place marshmallows on the plate.Microwave about fifteen seconds, just until they start to puff.  Remove from plate carefully, placing on each cookie along an edge. Pipe on eyes, a scarf, arms, and buttons for decoration.  

The only thing I didn't do was pipe on orange noses, which I will definitely do next time!  Other than the fact that these snowmen can't smell their own demise, these were a fantastic success!!

Tuesday, December 20, 2011

Dark Chocolate Creme de Menthe Cookies

Christian's class party is Thursday, and with it comes the dreaded Teacher Present.  The homeroom mother sent home a list of items his teacher likes, and chocolate topped the list.  So I've decided to make her a basket with lots of chocolate goodies.  This works out perfectly because I, too, have a love of chocolate.  This means I can make me a basket of chocolate goodies, too.  See?  Everyone's happy.


Dark Chocolate Creme de Menthe Cookies

1 cup softened butter
2 T olive oil
1 1/2 cups white sugar
2 eggs
2 tsp vanilla extract
2 cups flour
1 cup cocoa powder
3/4 tsp baking soda
1/4 tsp salt
1 cup dark chocolate morsels
1 cup chopped Andes mints

Beat together butter and sugar until fluffy.  Add in eggs and vanilla, beating well throughout.  In a separate bowl, whisk together flour, cocoa powder, baking soda, and salt.  Mix into butter mixture until evenly distributed.  Fold in olive oil until very well combined, then fold in dark chocolate and Andes mints.  Drop onto cookie sheet by the tablespoon, forming balls then pressing down slightly on them with the palm of your hand.  Bake in a preheated 350 degree oven for ten minutes.  Let cool on pan for 2 minutes, then remove to rack.

These are so amazingly delicious, I may have a hard time sharing with Christian's teacher.  She'll never know the difference...

Monday, December 19, 2011

Easy Cream Cheese Breakfast Cake

Today I woke up with a sweet tooth.  Not that this is different from any other day... but today I did something about it.  As I brewed my coffee I decided to throw together a breakfast cake with stuff I had laying around in my fridge. It was quick, easy, and seriously tastier than I could have imagined.


Cream Cheese Breakfast Cake
1 package refrigerated crescent roll dough
1 8 oz package cream cheese, room temperature
1 1/2 cup powdered sugar
3/4 tsp vanilla
1/4 cup melted butter or margarine

Crumble
2 T flour
2 T white sugar
1 T cinnamon
2 T cold butter

Preheat oven to 375. Lightly grease a loaf pan. Press 4 of the crescent rolls into the bottom of the pan, using your fingers to press the dough up the sides about half an inch.  In a small bowl, use a fork to mix cream cheese and powdered sugar until smooth and creamy.  Mix in vanilla.  Spread cream cheese mixture over the crescent rolls in the pan.  Lay the remaining crescent rolls over the top of the cream cheese without pressing down. Pour the melted butter evenly over the whole thing.
Make crumble by whisking together flour, sugar, and cinnamon then cutting in butter until the mixture resembles coarse crumbs.  Sprinkle over the top of the cake evenly.  Bake 20 minutes.  The middle will be a little gooey and the edges will be perfectly crisp.  Let sit five minutes before cutting.  Serve warm with hot coffee.  Yum!!