
I volunteered to bring goodies, and since someone else had already signed up for cupcakes, I decided it was time to get creative. I browsed the internet for hours for just the right combination of ease and ingenuity until I came upon this website entirely devoted to creepy edible Halloween recipes.
My family came to bake with me today, my beautiful niece Shea and my cousin Jamie, and we had so much fun making these Halloween goodies.

I decided on the Freaky Witch Fingers and the Brittle Meringue Bones. Both were amazing looking, although the lack of sweetness in the shortbread may not be well loved by the 6 and 7 year olds at the party. I'm including both of the recipes here, starting with the fingers, which were by far the easiest.

Freaky Witch Fingers
Ingredients:
1 cup butter, softened
1 cup powdered sugar
1 egg
1 tsp almond extract
1 tsp vanilla
2 2/3 cups flour
1 tsp salt
3/4 cup sliced almonds
In a medium bowl, beat together butter, sugar, egg, almond extract and vanilla, using an electric mixer. Then add in the flour and salt. Cover and refrigerate at least 30 minutes, as well as in between when you aren't using the dough. Roll about a teaspoonful of dough into a "worm" shape, about the size of a finger. Squeeze twice along finger length to create knuckle shapes. Press a sliced almond firmly into one end for the fingernail. Lay them on an aluminum foil covered baking sheet that has been sprayed with just a bit of cooking spray, then make slashes with a butter knife across in several places to form knuckles. I agree with the original recipe, which says to do clusters of three slashes for each knuckle.
Bake in 325 F oven for 20 minutes or until pale gold. Let cool for 3 minutes. Lift up almond, put a drop of frosting or a mixture of 1/2 c powdered sugar with a few drops of water onto nail bed and press almond back in place, otherwise they fall off too easily during storage and serving.
These aren't incredibly sweet, as is standard for shortbread, and we thought they might be good if instead of almond extract and vanilla extract, you just doubled the vanilla. Also, I think it'd be a good idea to serve with red buttercream as a dip.

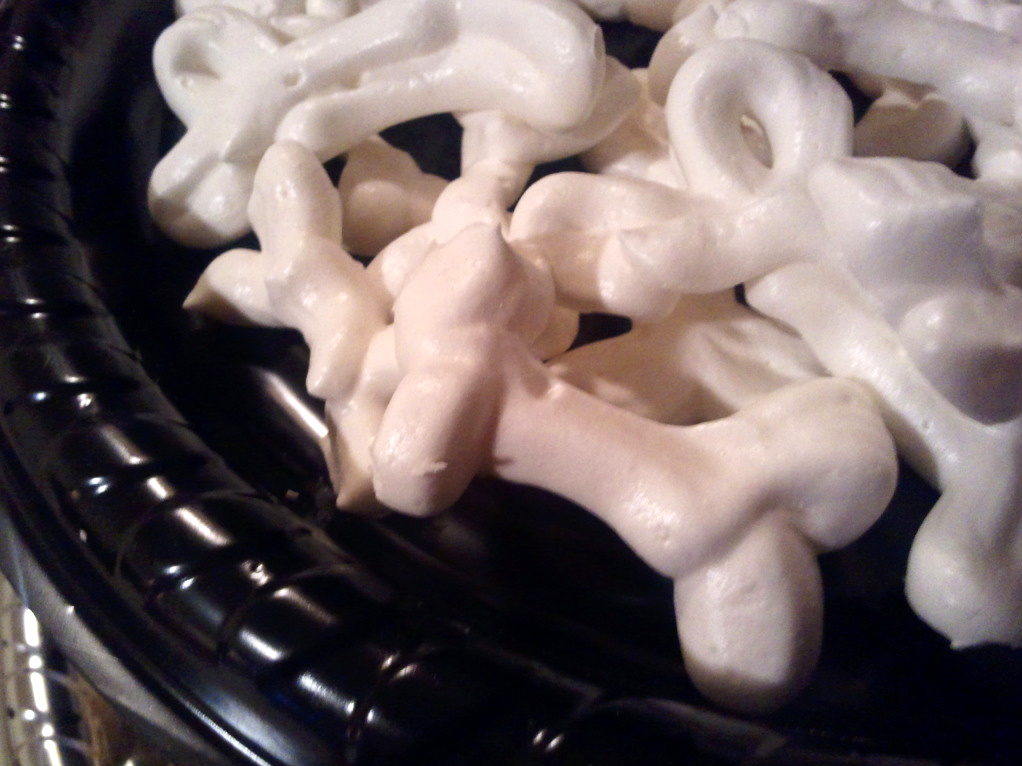
Next came the bone meringues. Today was my first meringue making attempt and Jamie and I washed our first two batches down the drain.
After a bit of internet research, I found out our problem... first of all, we were using a plastic bowl. Plastic carries fat and doesn't allow the egg whites to reach the soft peak stage, so using glass or copper is optimal. We also found that our egg whites had to be separated when cold then allowed to reach room temperature before the beating started. So learn from our mistakes, and perhaps your meringues will be peaky and perfect on your first attempt. Also, when storing, make sure to use an airtight container because any moisture will cause the meringues to become chewy and soggy. That being said, here are the instructions. I've adapted the recipe a bit from the way it was typed on the website I found purely for informational purposes. But when we got them right, we ended up with such a deliciously airy treat that it was definitely worth the added effort.
Ingredients:
3 large egg whites
1/4 tsp. cream of tartar
1/8 tsp. salt
2/3 cup white sugar
1/2 tsp. vanilla
Preheat oven to 200F. Line cookie sheet with brown paper bag or parchment, although I used aluminum foil and it worked just fine. In a medium sized bowl at high speed, beat egg whites until foamy and pour in cream of tartar and salt while continually beating. Gradually beat in sugar. Gradually means verrrry slowly, a teaspoon at a time, and make SURE to let all of the sugar dissolve fully before adding more. I can't stress this enough. Add vanilla, still beating continually. Place in pastry bag fitted with a medium plain piping tip, or in a Ziploc bag with the tip cut off. Pipe 3" bone shapes onto prepared sheet. Bake 1 hour until set. Turn off oven, dry in oven 1 hour. Don't even open the oven to peek. Makes 4 to 5 dozen small finger-sized bones.

No comments:
Post a Comment